
 Whether you are renting a clarinet, saxophone or other reed instrument right now, thinking about it, or playing your 500th concert, understanding reeds will help you create the highest quality sounds and care well for your reeds.
If you’re a parent whose child plays any type of reed instrument for their school band, read on to learn how to choose reeds that will best suit your young musician (and explore Kincaid’s rental options if you still need to get them an instrument!).
We’re going to talk about all aspects of reeds, especially clarinet reeds and saxophone reeds. In this post, you’ll find:
- Which instruments are reed instruments
- What reeds are made of
- Parts of a reed
- Strengths of a reed
- Pairing your mouthpiece and reed
- How to care for your reeds
- So, what’s next?
Let’s start with the basics.
Which instruments are reed instruments
There are a variety of instruments that use reeds, many of which we have here at Kincaid’s:
| Single Reed | Double Reed |
| Eb Clarinet Bb Clarinet Alto Clarinet Bass Clarinet Contra Bass Clarinet Soprano Saxophone Alto Saxophone Tenor Saxophone Baritone Saxophone Bass Saxophone |
Oboe Bassoon English Horn |
Reed instruments are played by using – you guessed it – reeds. A single reed, like a clarinet reed or saxophone reed, is a thin piece of flat material that is held to the instrument’s mouthpiece by a ligature. The reed vibrates when a musician blows air between it and the mouthpiece, producing a certain tone. A double reed is two reeds held together with space between them. Both reeds vibrate as the musician blows between the two reeds to produce the instrument’s sound.

The tenor sax is a single reed instrument
From the rich, dark tones of the clarinet to the clear, bright notes of the oboe, reed instruments make up a rich part of bands and orchestras around the world.
What reeds are made of
Reeds come in many shapes, sizes and materials. Creating reeds from cane is a fascinating process, demonstrated in this article by Vandoren, one of the world’s top reed producers.
Cane reeds
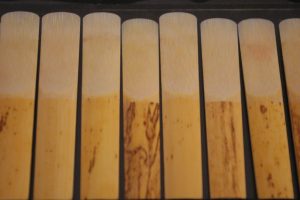
Organic cane reeds start out as a type of grass that originally grows in the Mediterranean, called “Arundo Donax.” Arundo Donax grass looks similar to a bamboo plant but is softer. Once the reed plant is fully grown, it is harvested and dried out for approximately two years (good things take time!). The dry plant is nearly as strong as bamboo and ready to be cut into the proper reed shape.
First, the cane (which looks like a hollow tube) is sectioned into quarters length-wise. After the cane is cut to the right size, it is sanded down to produce a perfectly flat table, and then cut into a conical shape.
The reed tip is then shaved to its precise, very thin shape using diamond-cut blades. Watch the video from this Vandoren article to see the process step by step!
One common myth is that reeds are produced to be a specific strength, but what really happens is that once cut and shaped to the perfect size, the reeds are measured for strength after the fact, then sorted with other reeds of the same strength! We’ll examine reed strengths more in depth a little bit later.
Synthetic reeds
Like we mentioned before, there is also another way to make reeds: synthetically. Hollow carbon fibers are glued together with resin to form synthetic reeds. Though the price is higher, these reeds have the same thickness and density as natural reeds, without the natural faults and inconsistency in the reed grain.
Sometimes, musicians prefer synthetic reeds for their durability. They tend to last longer because they are not affected by temperature or humidity. Synthetic reeds may be quite a bit more expensive, but marching bands will often use them because of the ease of chipping a cane reed, or because it holds up better in extreme temperature!
Some reeds are a combination of natural and synthetic materials, like Rico’s Plasticover Reeds. Reed makers have found that a thin plastic coating over a natural reed protects the wood from fluids that may shorten its life.
No matter what a reed is made of, it always has the same nine parts. Let’s look at them together!
Parts of a reed
Reeds, though a simple shape and small size, are really quite complex. In this little, one-ounce piece of material are nine parts, and they are all important to the sound quality of your instrument.
Though the reed is delicately crafted using the process above, no two are alike! The organic nature of the cane makes each body slightly different.
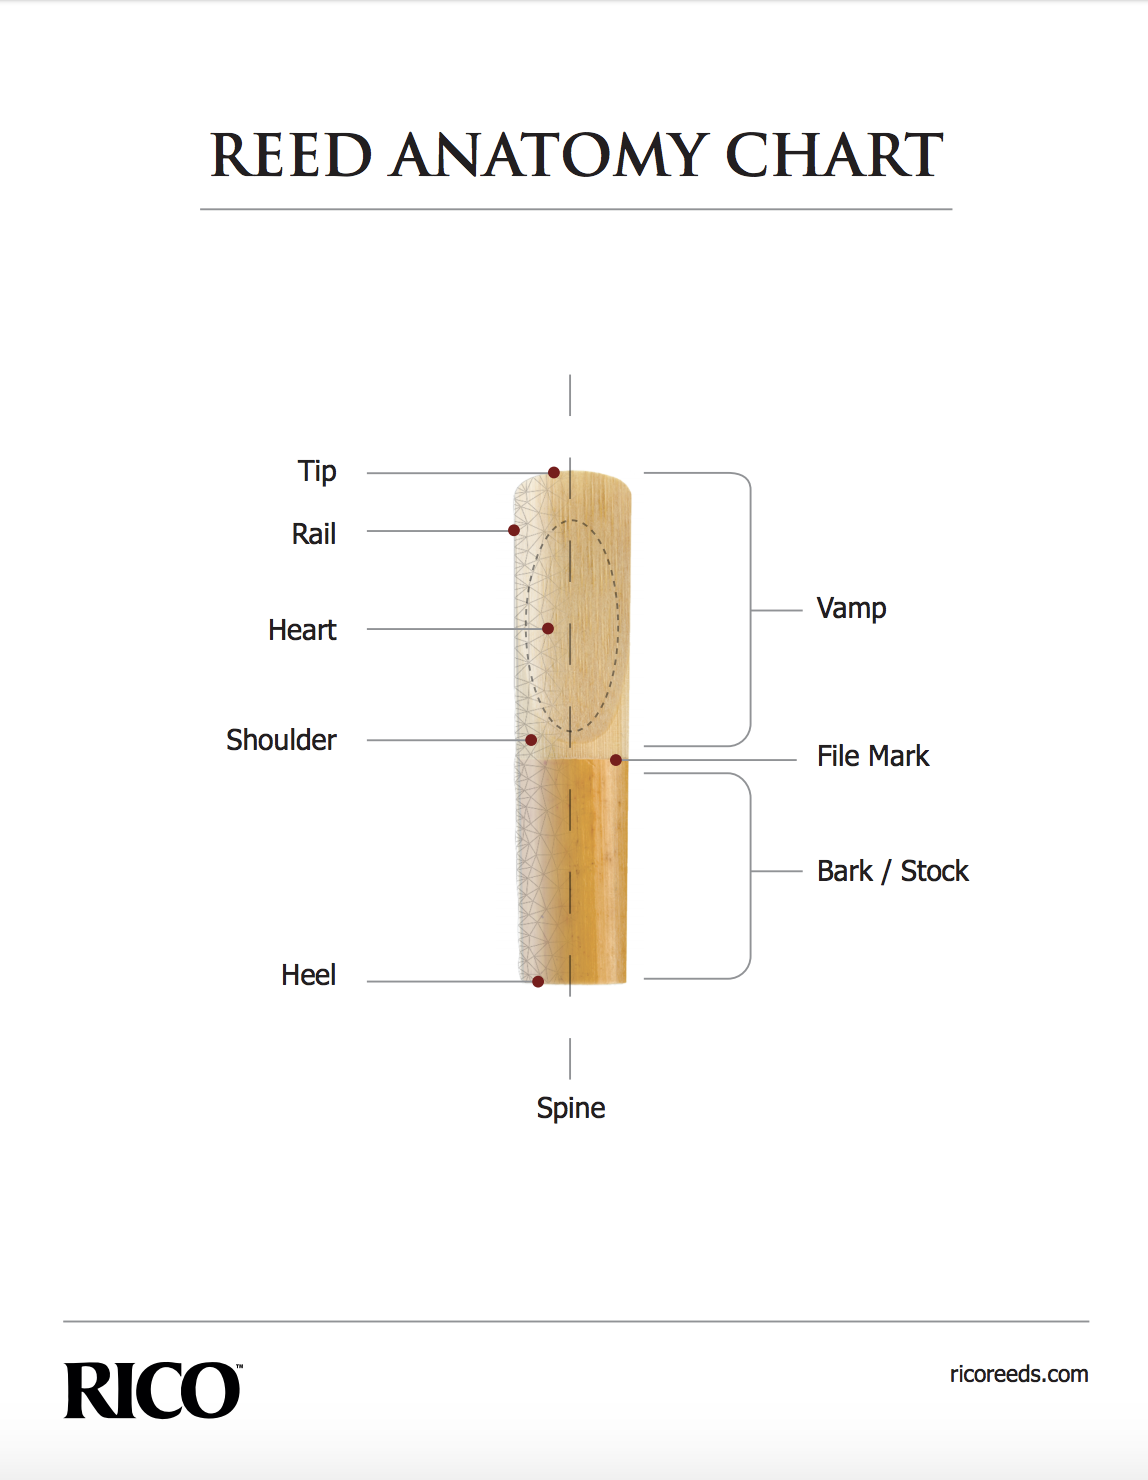
From Daddario.com
As you can see in the diagram, the tip is the part the air will initially pass over when played, as well as the part the tip of the tongue will touch when “articulating”, or starting the sound. The heel is the last thing the air touches before traveling through the rest of the instrument. The thickness of both the tip and the heel are what affect the sound quality of the reed most.
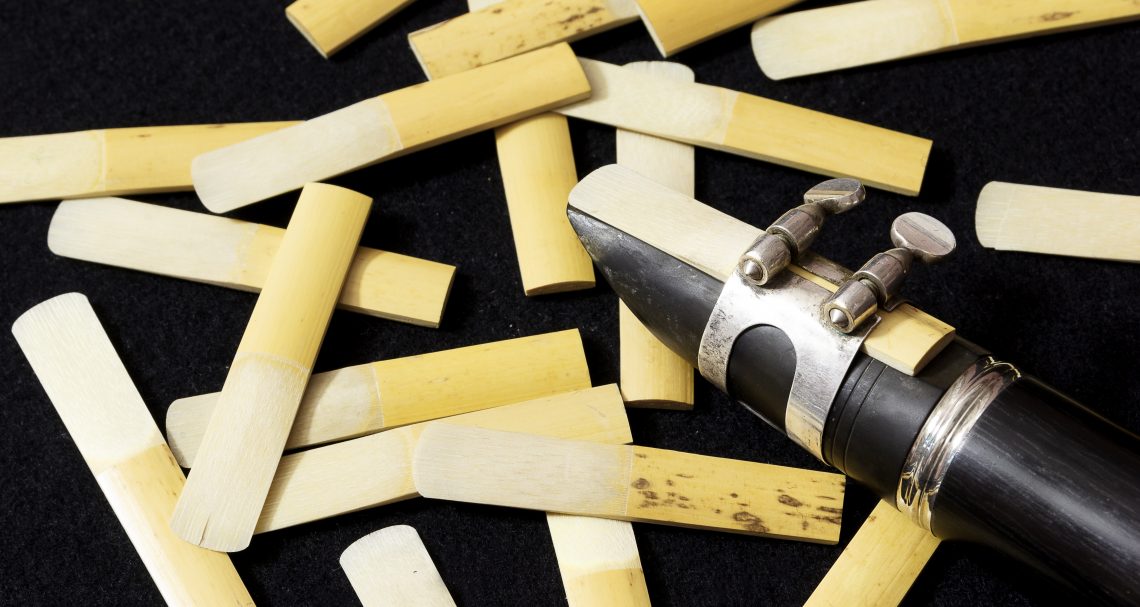
A saxophone or clarinet reed needs to be attached to a mouthpiece (by way of a ligature) in order to produce sound in those respective instruments. The tone is created as the air pushes through the instrument, pressing the reed against the opening of the mouthpiece and causing a vibration. As these vibrations take place the sound is made.
Instruments with double reeds, including the oboe and bassoon, produce sound a little bit differently. They function without the necessity of a mouthpiece. When air is pushed through a double reed instrument, the two reeds vibrate against each other to produce a tone.
The reeds sound different according to their strength, which we will delve into now.
Strengths of a reed
 Reeds are categorized according to their strength, or density. They vary in strength in half measures (most often). So, like shoes, they generally go up a half of a size in strength, starting at 1, 1 ½, 2, 2 ½ and going up to strength 5. With more advanced reed brands, you’ll even find sizes between the half-sizes (ie. 3, 3+, 3.5, 4), which I’ll explain in a moment.
The strength indicates the resistance level of the reed. The higher the number, the stiffer the reed material. Like shoe sizes, the resistance/stiffness of the reed may vary between reed manufacturers and even reed brands from the same manufacturer.
Sometimes, strengths of the reed are referred to on a scale of soft to medium to hard, with soft being the low strengths and hard being the higher strengths.
Making reeds that include 1/4 step strengths means that there is greater consistency from reed to reed within that given strength, as well as the strengths around it. By creating a 3+, like in our example above, 3’s, 3+’s and 3.5’s all become more consistent, since, for instance, a reed slightly stronger than a 3 is no longer categorized as a 3, but as a 3+.
To change the strength of a synthetic reed, reed makers add or subtract layers of material to change the thickness.
So, how do you know what strength you need? We recommend that beginners start with a 2 or 2.5, also referred to as “soft” reeds. The more experienced a player becomes, he or she will likely move up in reed strength.
Thankfully, we’ve put together this reed strength chart for you.
This simple, easy-to-read guide will help you determine what strength you’ll need for alto saxophone, tenor saxophone and Bb clarinet reeds.
Download yours: The Ultimate Single Reed Strength Comparison Chart
But don’t think that reed instrument players automatically move up as they become more familiar with the instrument. Each musician’s reed strength depends more on
- his or her own personal playing style
- the mouthpiece chosen for the job (we’ll look at that in a moment)
- the player’s lung capacity and embouchure strength
In fact, many young musicians believe that the strength of the reed they use is a sign for how good a player they are – they figure the higher the number, the better they are. They will even use it as some kind of status symbol to suggest they are more or less advanced than other students in their section.
This couldn’t be further from the truth! Please don’t allow your child to succumb to or perpetuate that myth!
So how do you know it’s time to look into a higher strength reed?
- Your sound is becoming overly bright for your instrument.
- The start of a note isn’t articulating clearly – a delay in the response of many notes.
- You feel like you’re blowing against nothing – your breath control becomes more difficult because your air is gone quickly (the opposite of back-pressure).
If your reed is too hard, you likely are straining to play, having to blow particularly hard, and experiencing an unnecessary amount of back-pressure. You might even turn bright red! It’s also likely you’re getting an airy sound – not a very pleasing tone. ![]()
To hear what these different symptoms sound like, check out this video from D’Addario Woodwinds. Even though the musician demonstrates on an alto saxophone, anyone playing a single-reed instrument will benefit from seeing this!
Pairing your Mouthpiece and Reed
With the right mouthpiece and reed pairing, your reed instrument can produce the best quality sound.
The folks at D’Addario can help you choose the right reed and mouthpiece pairing in this video.
As a general rule, mouthpieces with wide tip openings and/or longer facings work well when paired with softer reeds. Mouthpieces with a shorter facing or tip opening pair better with harder reeds.
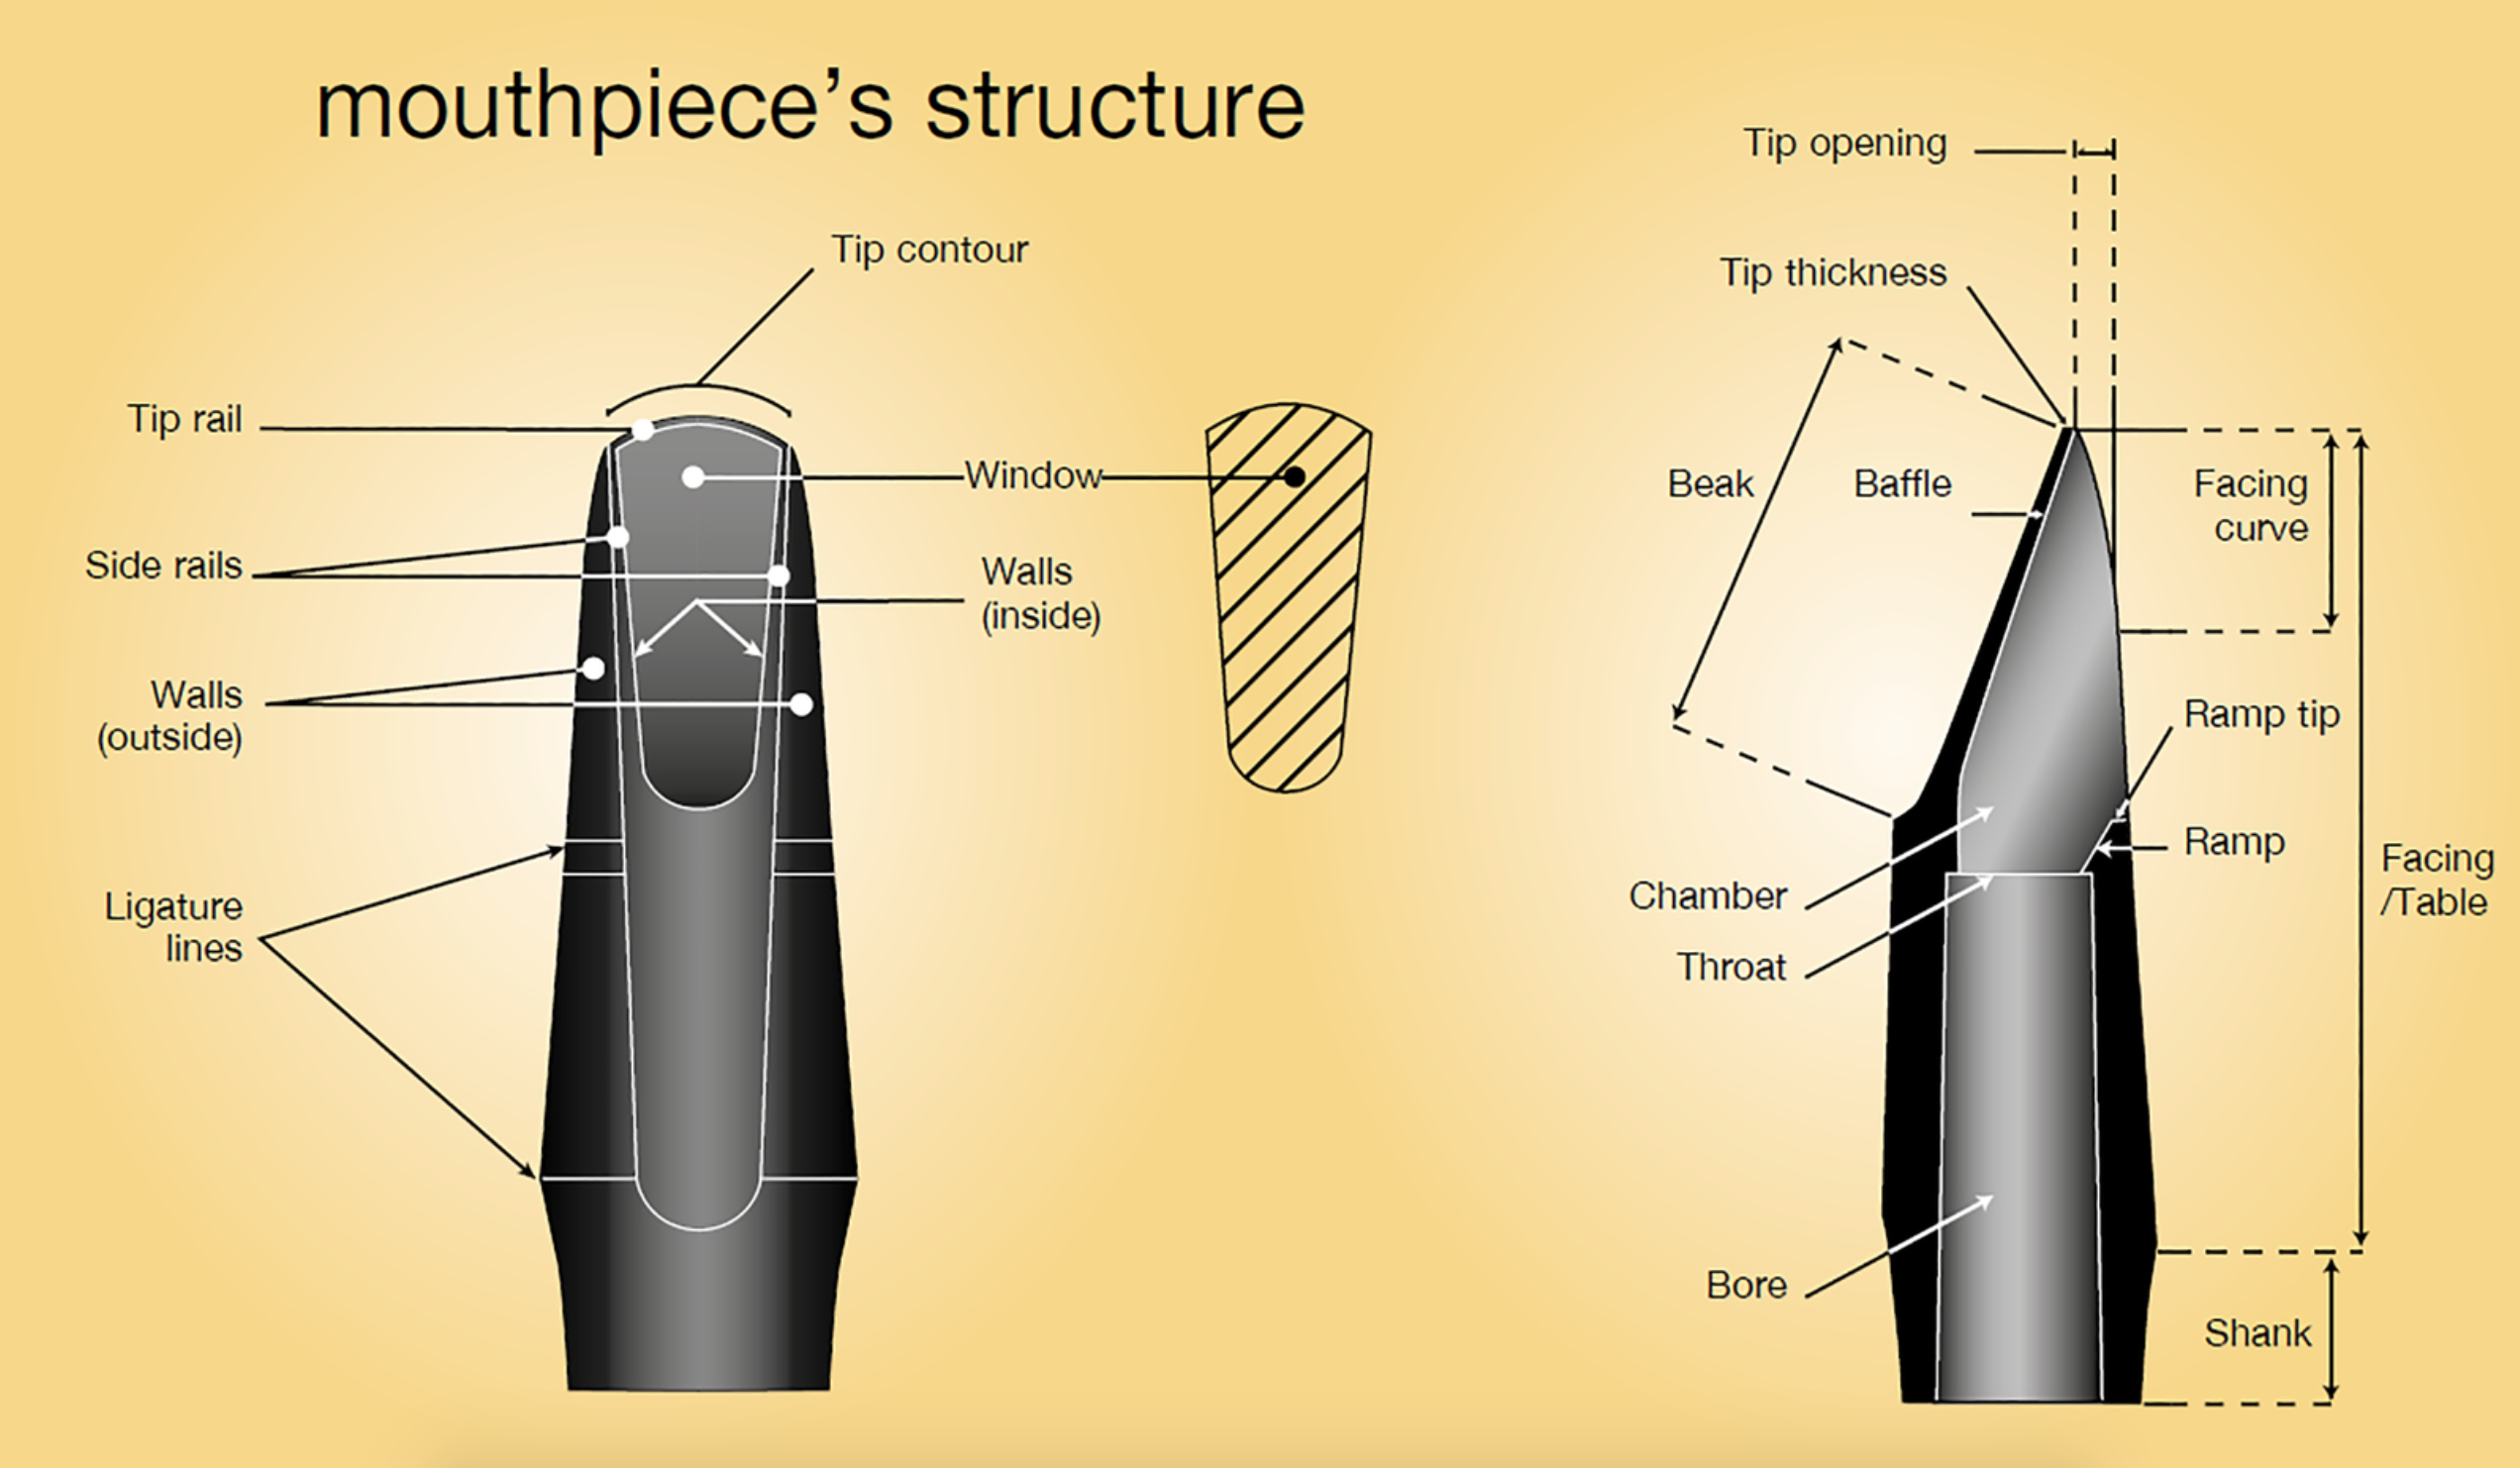
From Dansr.com
Musicians can also choose a reed by his or her musical genre. A classical saxophone or clarinet player will likely want a reed and mouthpiece combo that produces a darker tone. Alternately, a jazz saxophonist or clarinetist will likely choose a combination that creates a brighter sound.
Which brand is best?
You may be wondering what brand to begin with. At Kincaid’s, we sell several types of reeds made by reputable companies. We recommend the brand Rico by D’Addario or Juno by Vandoren for beginners, and Vandoren Traditional, D’Addario Reserve and Legere for players a little farther into their musical journey.
Now you are the owner of a reed instrument, mouthpiece and reeds. How on earth do you take care of them?
How to care for your reeds
Your instrument is your responsibility. If you’ve ever babysat, you know how harrowing that can be at times.

Reeds require care, just like kids do!
Though a reed instrument won’t leave you with spaghetti on the floor and marker on the walls, it still requires a close eye and consistent care.
For example, natural reeds warp as they dry out and need to be broken in over time. Some will break all of a sudden, and you’re left with a splintered piece of cane (or carbon).
But like babysitting, reed care doesn’t have to be that difficult if you know what to do. Here are our top tips for reed care:
-
- Prevent warping by taking your reeds off of the mouthpiece after you’re done playing. This lets them dry properly and keeps their original shape for longer. It’s also important not to use the plastic sleeve the reed comes in – there are normally ridges on the inside of those that protect reeds during shipment, but contribute to warping once they’re being used.
- Store your reeds (carefully!) in a reed case. Reeds are delicate, and they last longer when stored at a specific humidity. D’Addario suggests the relative humidity level should be exactly 72%. A reed case, especially those with humidity packs that help maintain the humidity within the case, protects reeds from excessive moisture or dryness. (Read more about those below!) They also prevent reeds from breaking when dropped or knocked over.
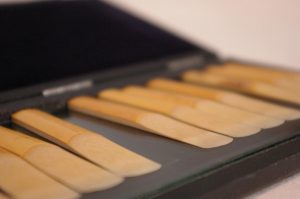
Storing your reeds in a case helps them last longer
- Don’t touch the tip of the reeds except with the tip of your tongue while playing. Bring a tissue to wipe the gloss or chapstick off your lips before you begin!
- Rotate three or four reeds to keep them in good condition. This habit helps break your reeds in evenly, meaning they each last longer. Pro tip: using a fine-tip permanent marker, write the date you begin with each reed onto the back of the reed so you can keep better track of your rotating order.

Reed Care Resources
Vandoren has an excellent resource for reed care that you can “reed” (🙄 – sorry…I know – that was bad) for even more information. If you’re looking to care for your synthetic reed, use Legere’s reed care guide.
D’Addario is also a trusted resource, and their “Single Reed Survival Guide” is helpful for any player, new to advanced! Or you can take less than one minute to view this video to learn from a D’Addario pro, Kyle Young, a Fairborn High School Alum and current Associate Director of Bands at Carmel High School in Carmel, IN.
Save money buying reeds
Speaking of making your reeds last a long time, let’s talk about saving money.
Owning a reed instrument and all of the parts you need to make it work can be an expensive endeavor. Thankfully, following a few tips can keep your hard-earned dollars (and your peace of mind!) in check.

Make your piggy bank happy with proper reed care!
First, buy in bulk. As we said before, buying reeds in bulk packs helps your child’s reeds last longer. Having multiples helps your child break several reeds in evenly rather than wear one out faster. Please note: You need to inspect the reeds you buy in boxes for cracks, knots or other wear. For every box of ten, you might throw out three to four due to poor quality. That’s normal! This won’t be the case with synthetic reeds, which usually cost a few dollars more than their cane counterparts.
Purchase a reed guard. We’ll reiterate this again as well: Storing your reeds properly can and will increase their life. The less new reeds you have to buy, the better! A reed guard conveniently and securely stores your reeds (click to shop our selection).
Store in a case. If you’re able, you might want to upgrade to a reed case that can be used with a humidity pack. The pack inside the case gives two-way humidity control to keep your reed tips flat and prevent cracking and warping. They are worth the $5-10, as they greatly improve the life of your reeds!
Your reed may last anywhere from a few days to a few weeks. Once it’s chipped or warped, it’s not going to play properly. The best thing you can do is use these tips to make your reeds last as long as possible.
So, what’s next?
If we’ve piqued your interested in playing a reedy great instrument (sorry, I can’t help myself!), we’d love to get you started. And as always, if you already play a clarinet, saxophone or other reed instrument, we are here to answer your every question.
Contact us today!
Let us know: Which reed instrument do you play or want to try? Do you use a cane or synthetic reed? Which do you like better, and why? What is one thing you can do to improve your reed instrument care? What’s another way you take care of your reeds/save money?
photo credit: “IMGP2692.JPG” & “IMGP2683.JPG” by alyak is licensed under CC BY-SA 2.0


2 Comments
thanks for the information
I’m glad we could be of help!